As you might have noticed, all this is taken care of by the OS itself, you don’t have to manually assign these letters. But what is the need to assign letters to these drives? Well, it tends to give a unique indication to each of these drives, which helps the Storage partition of your PC in identifying them. However, in some instances, your PC might not be able to assign a letter to the connected device. This in turn would lead to the Storage partition’s inability to identify the connected device. As a result, the said device would not appear in the File Explorer, or anywhere for that matter. This would then translate to your inability to use that device, which would be the last thing that you would wish for. Fortunately, there do exist a couple of workarounds that have been known to fix the issue of Windows 11 being unable to assign a drive letter. And in this guide, we will make you aware of just that. So without further ado, let’s get started.
How to Fix: Windows 11 Unable to Assign Drive Letter?
There exists three different methods through which you could rectify the aforementioned issue. Apart from that, we will also show you the steps to manually assign the drive letters on your Windows 11 PC. Follow along.
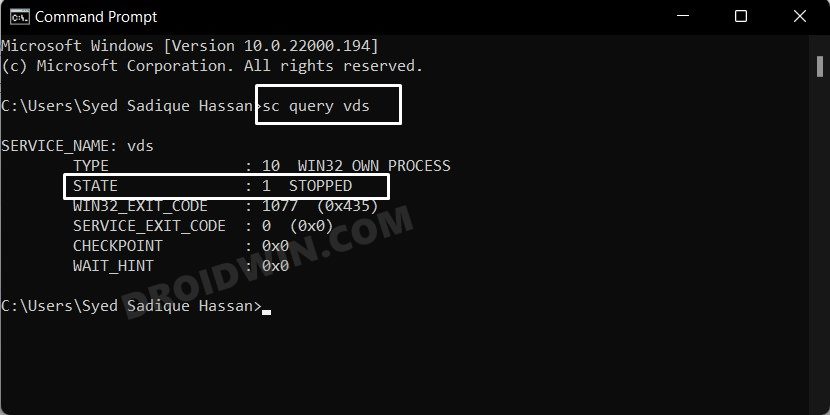
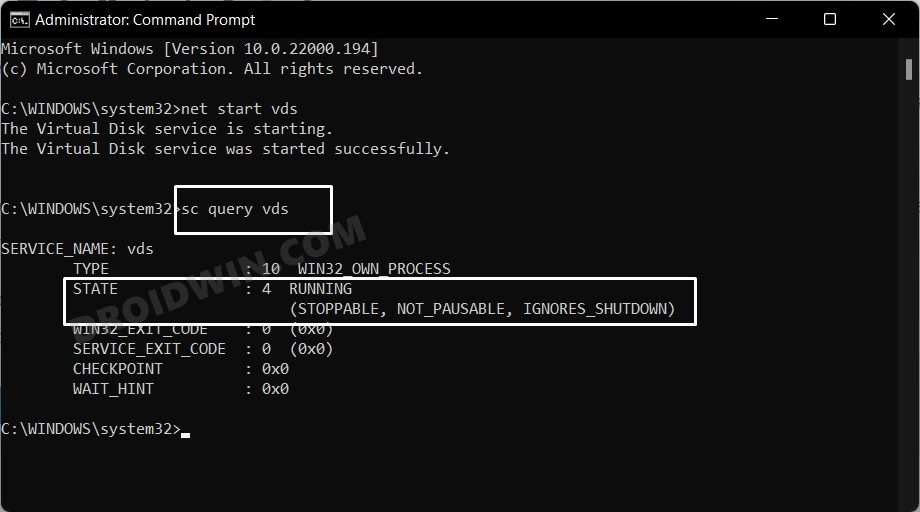
FIX 1: Restart Virtual Disk Service
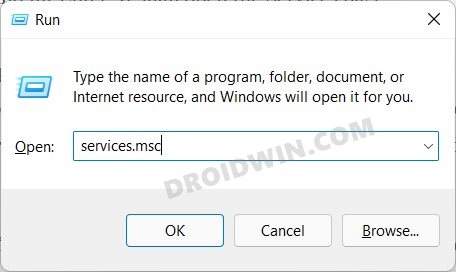
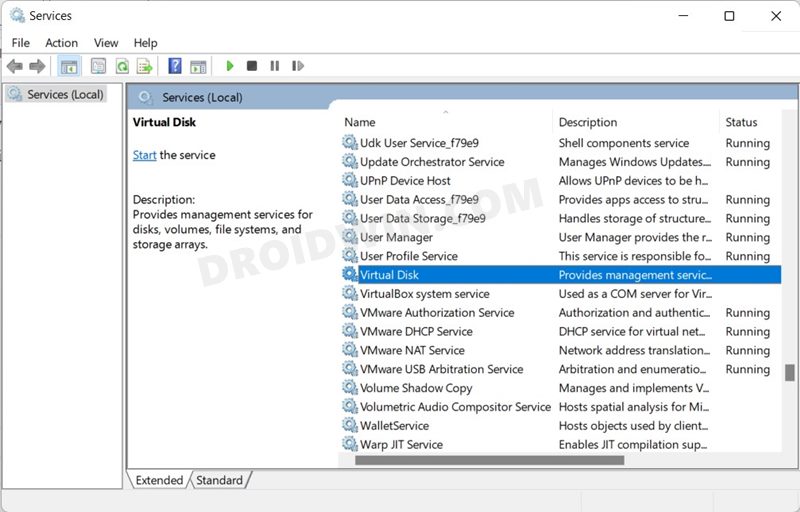
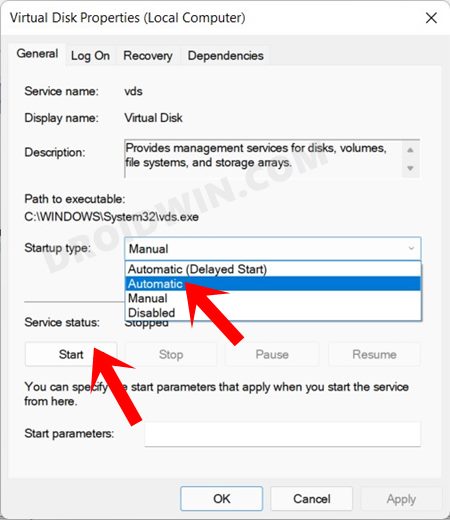
The Virtual Disk Service is responsible for automatically assigning drive letters. So if there’s an issue with this service, then your drive will remain unsigned and hence the Storage Sense wouldn’t be able to identify or read it. So the best way out is to restart this service, which could be done as follows: Troubleshooting Tips: If for some reason you are unable to Start/Stop the Virtual Disk Service, then there’s an alternate way out. You could carry out this task via the CMD window as well, here’s how:
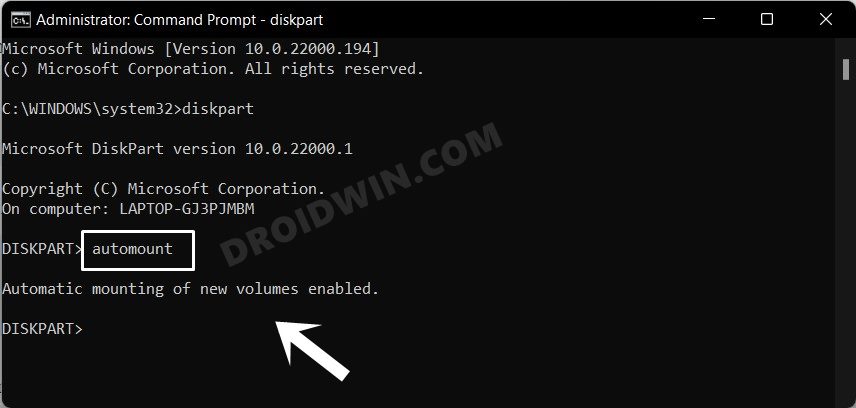
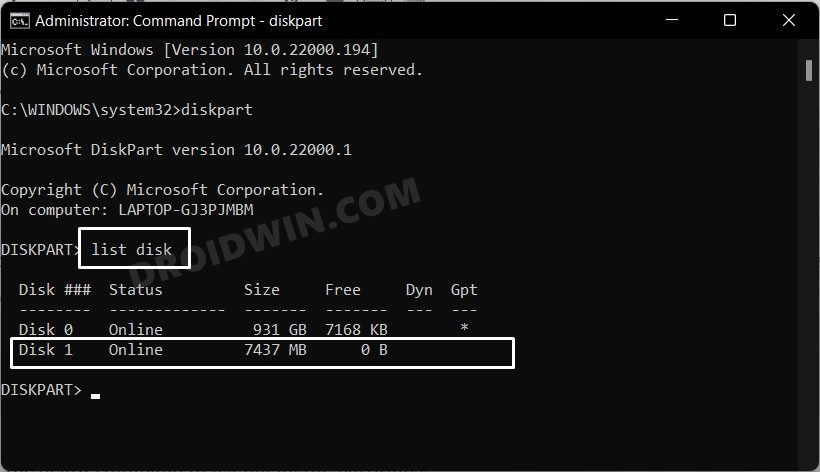
FIX 2: Enable Auto-Mount
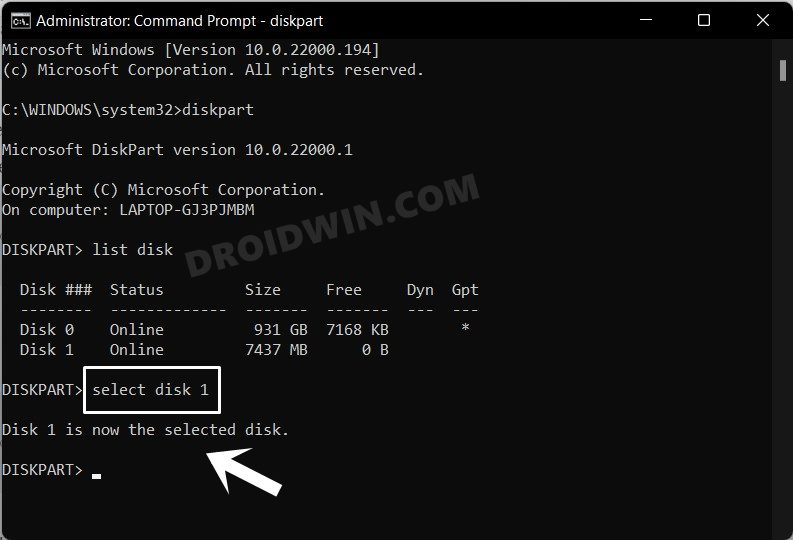
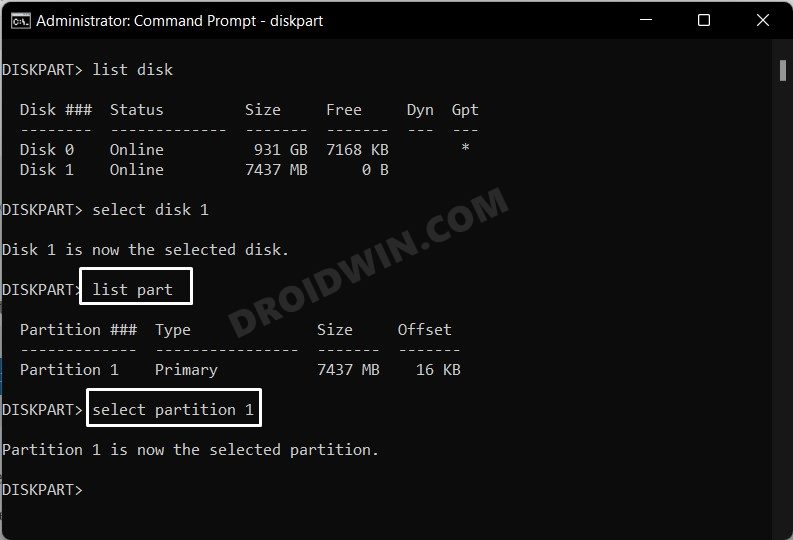
In its default nature, storage partitions automatically mount the connected device and subsequently assigns the drive letter as well. However, if for some reason the partition fails to mount them, then the letter assignment of the drives would fail as well. So you should consider manually carrying out this task via Diskpart and CMD. Follow along.
FIX 3: Disable Drive Hidden Attributes
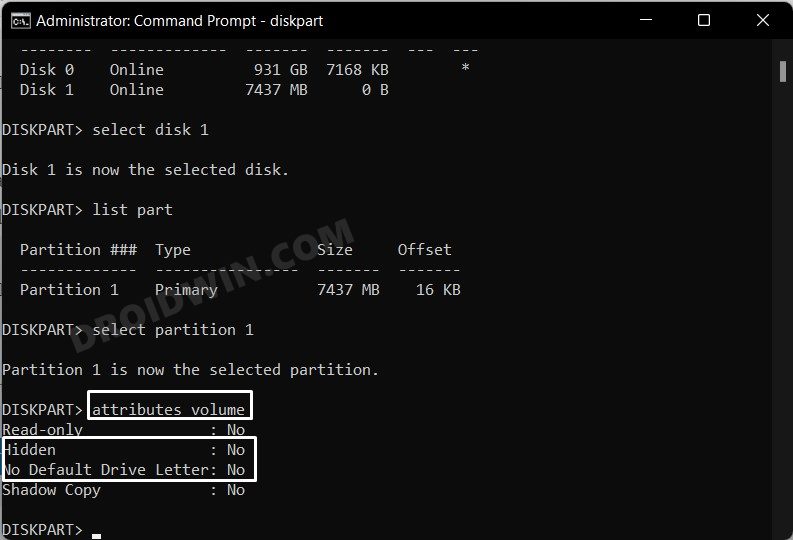
In some instances, the Hidden and/or No default drive letter attributes get activated on your system. When that happens, the File Explorer wouldn’t be able to display any drive letter, even if everything is working well and good with Storage Sense. To rectify it, the procedure is fairly simple- you just need to disable this Hidden attribute. Here’s how:
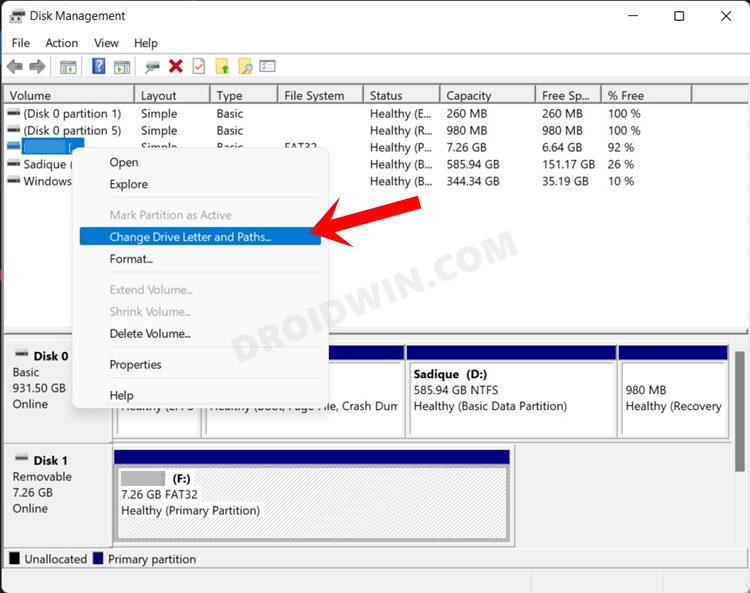
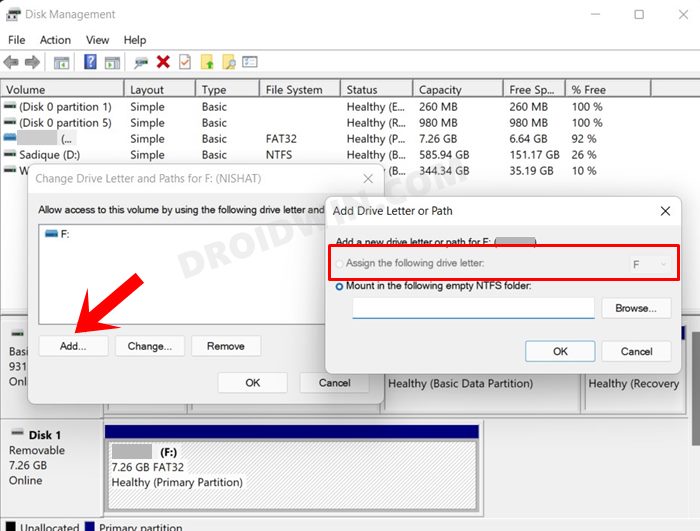
FIX 4: Manually Assign Disk Letters in Windows 11
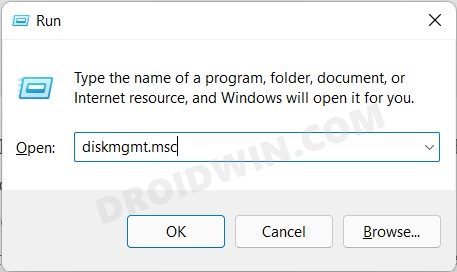
If none of the aforementioned methods managed to spell out success, then lets’ manually carry out this task. And as opposed to other manual tweaks, this hardly takes a minute to complete. So on that positive note, let’s get started. With this, we round off the guide on how you could fix the Windows 11 unable to assign a drive letter issue. We have shared four different methods for the same. Do let us know in the comments section which one spelled out success for you.
Fix USB Device Not Recognized Error In Windows 11Fix Windows 11 High CPU and Disk UsageHow to Allow Apps Through Firewall in Windows 11 | Add to Exception/Exclusion ListHow to Take Ownership of Files and Folders in Windows 11
About Chief Editor
